How to Install Artificial Grass on Dirt
Tired of that patchy, maintenance-heavy lawn? Installing artificial grass offers a year-round green solution, but laying it directly on dirt presents challenges. Uneven soil creates bumps and dips, while poor drainage leads to puddles and premature deterioration. Many homeowners start enthusiastically but become frustrated when their DIY turf installation looks amateur.
Without proper ground preparation, your investment will quickly show problems. Weeds might grow through the backing, creating unsightly bulges. The surface could develop depressions where water collects, causing mold and shortening the lifespan of your artificial lawn.
To install artificial grass on dirt, you must first clear vegetation, level the area, add a crushed stone base, and install proper drainage. This foundation work ensures your synthetic turf stays flat, drains properly, and maintains its appearance for years. Careful preparation prevents the common pitfalls that plague rushed installations.
This guide provides step-by-step instructions for creating the perfect foundation for your artificial grass project.
Key Takeaways
- Remove existing plants with a turf cutter and grade the soil to ensure proper drainage.
- Install weed barrier fabric over the soil to prevent unwanted growth beneath the artificial turf.
- Create a stable base by spreading and compacting a 2-4 inch layer of crushed stone or decomposed granite.
- Position turf rolls in the same direction, allowing slight overhang for precise trimming after installation.
- Secure edges with landscape staples and apply 2-3 pounds of infill per square foot before brushing the surface.
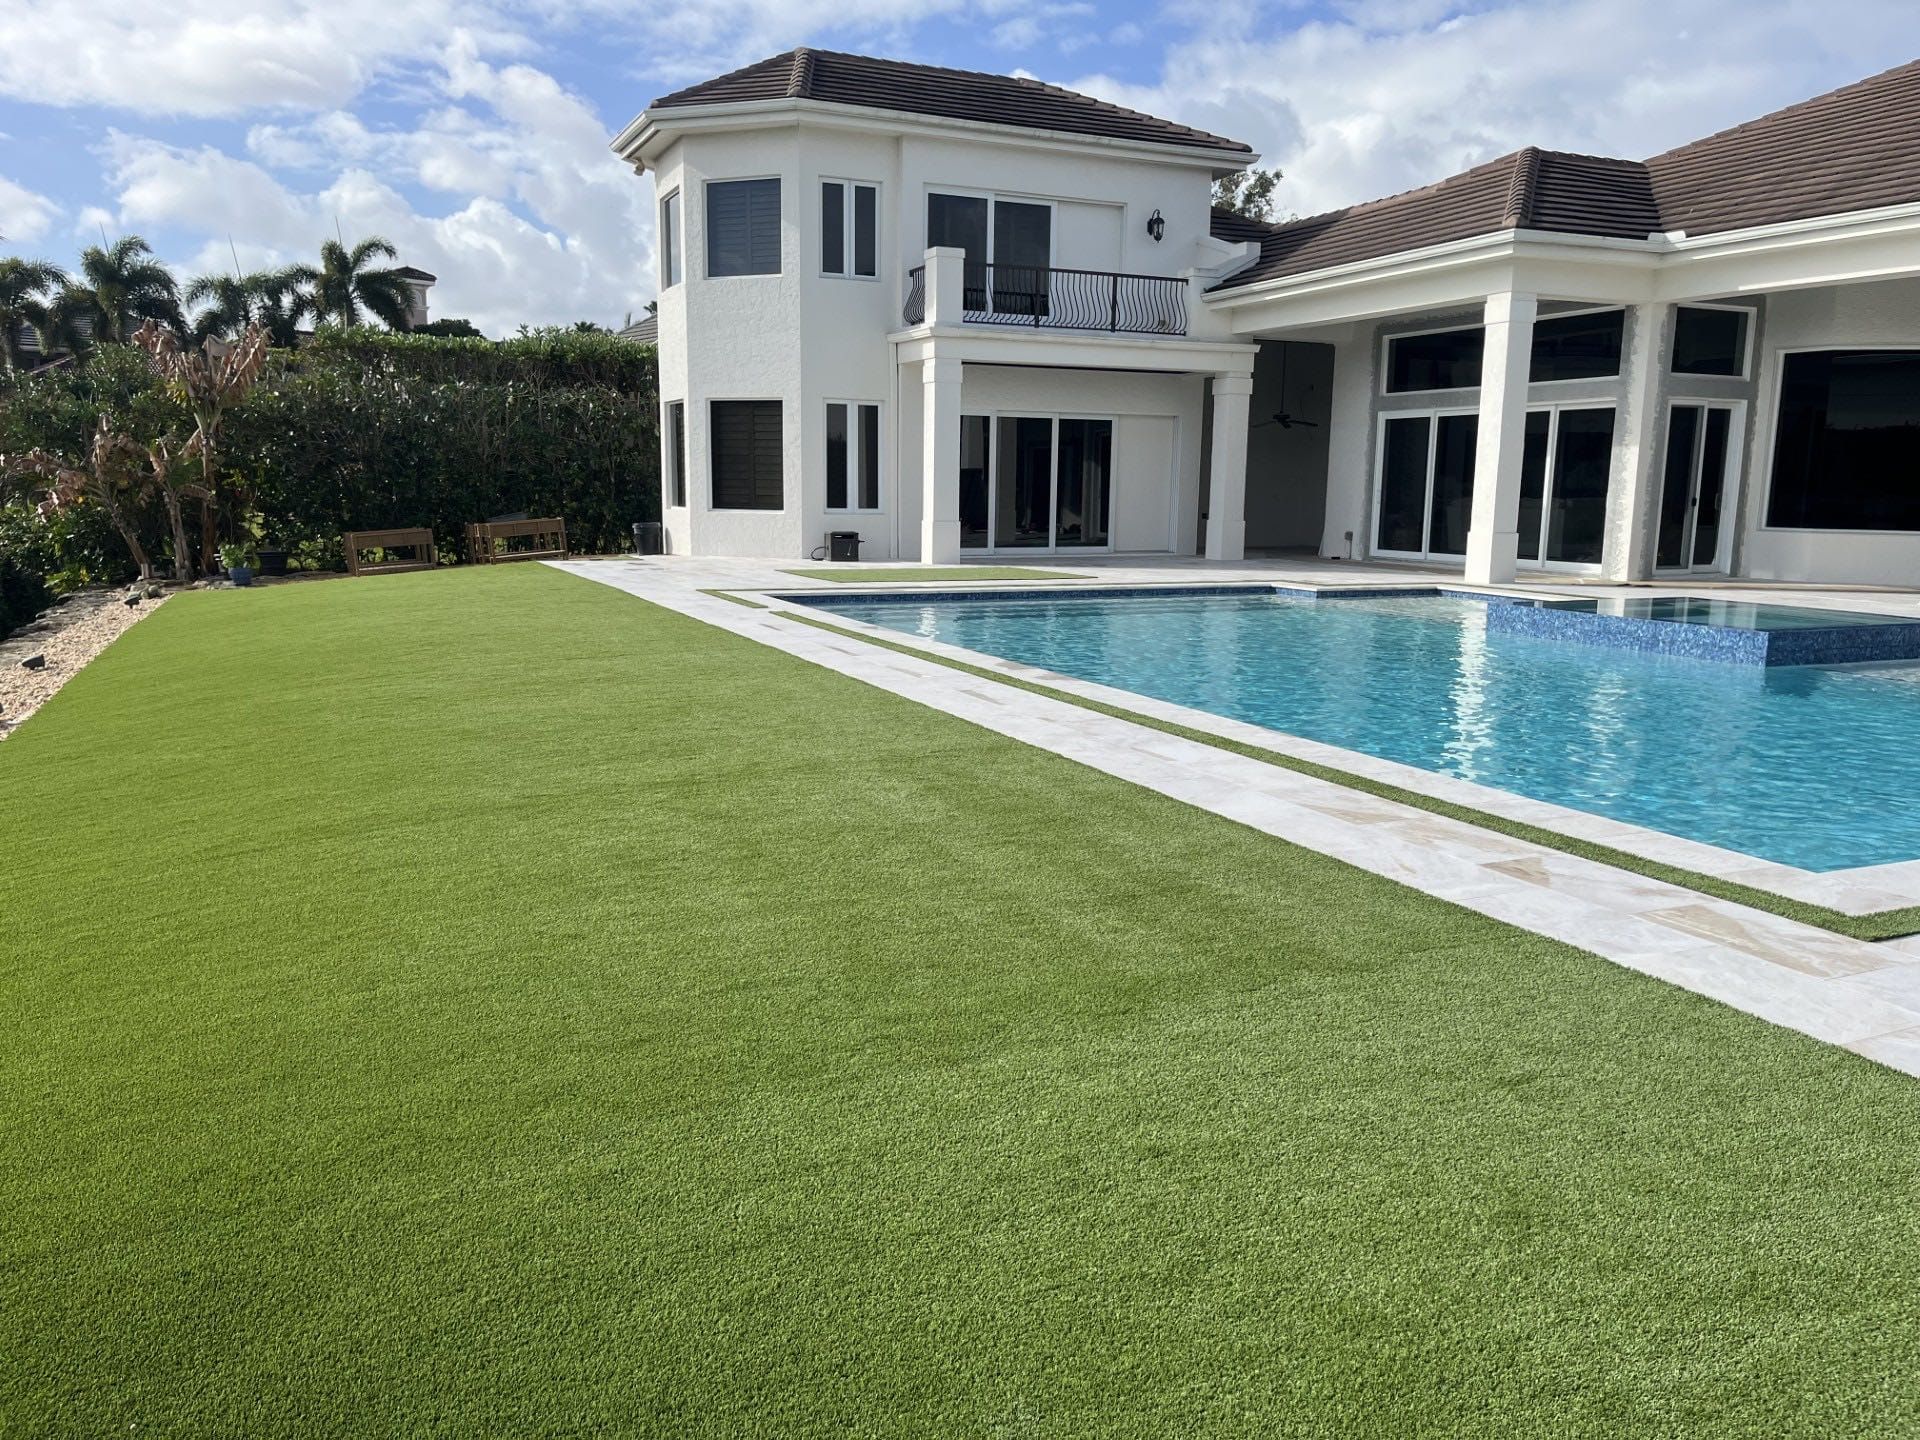
Benefits of Choosing Artificial Grass
Artificial grass offers many advantages over natural grass. Homeowners save money by avoiding mowing, watering, fertilizing, and reseeding costs. Quality synthetic turf can last up to 20 years with little maintenance.
Modern artificial turf helps the environment in several ways. It saves thousands of gallons of water each year. Chemical runoff and carbon emissions are also eliminated when switching to synthetic grass.
The turf stays usable throughout the year regardless of weather. It maintains a bright green color during all seasons. Water drains well through artificial grass, preventing puddles and mud from forming.
If you install artificial grass, you'll enjoy consistent beauty without the constant work. Children and pets can play on it right after rain. The surface remains even and attractive with minimal effort from property owners.
Artificial turf provides an allergy-free environment for family members who suffer from grass-related allergies while maintaining a lush appearance year-round.
Essential Tools and Materials
You need specific tools and materials for artificial grass installation. A turf cutter removes existing plants. A plate compactor prepares the soil, while drainage mats ensure water flows properly underneath.
Landscape fabric stops weeds from growing through your new turf. Crushed stone or decomposed granite creates a stable base layer. These materials help your artificial grass last longer.
For installation work, keep a carpet knife with extra blades handy. Seaming tape and adhesive join sections of turf together. U-pins or galvanized nails secure the edges to prevent shifting.
Measuring tools ensure precise cuts for a professional finish. A tape measure and chalk line mark your cutting lines. If you measure incorrectly, you might waste expensive turf material.
A power broom or stiff brush helps distribute infill material evenly. Infill supports grass fibers and keeps them standing upright. It also adds weight to prevent the turf from moving.
For concrete installations, you'll need a drill to create drainage holes that prevent water accumulation and mold growth.
Measuring Your Lawn Area
You need to know your lawn size to buy the right amount of artificial turf. Take a tape measure and record the length and width at the widest parts. For odd shapes, break your lawn into simple sections like rectangles or triangles.
Your site plan should show trees, flowerbeds, and other features that need special cutting. Add an extra 5-10% turf to your order for trimming and mistakes. Draw everything on graph paper with clear measurements.
The turf grain direction matters for a natural look. It should face toward where people usually view your lawn. This small detail makes a big difference in the final appearance.
Consider consulting an installation expert for a professional yard assessment to help determine the right type of artificial grass for your specific needs.
Removing Existing Vegetation
You must clear all vegetation before installing artificial grass. Use a sod cutter to remove 1.5-2 inches of grass and roots. A sharp spade works well for smaller areas.
Apply a non-selective herbicide after removing the top layer. This kills remaining plants and stops new growth. Wait 1-2 weeks for the herbicide to work fully.
Check the area for any stubborn weeds during soil preparation. Remove these by hand if you find any. Rake the area to gather loose plant material.
A rotary tiller helps break up compacted soil. Till to a depth of 3-4 inches for best results. This creates a good base for your artificial grass installation.
Alternatively, you can use solarization techniques by covering the area with black plastic for several months to naturally kill grass and weeds using sun exposure.
Excavating and Leveling the Ground
Proper excavation creates a solid base for artificial turf. You need to dig 3-4 inches below your desired final grade. This space will hold base materials and the turf itself.
Remove all rocks, roots, and large debris from the soil. Grade the soil with a slight slope away from buildings for drainage. If you skip this step, water might pool under your turf.
Compact the subsoil using a plate compactor. Make several passes to ensure stability. Check for low spots with a straight edge and level.
Steep yards may require terraces or special drainage solutions. Taking time during this stage prevents future problems. Your artificial grass will last longer if the foundation is level and stable.
After compaction, add a layer of crushed stone as a base to create additional stability before installing the turf.
When selecting a weed barrier fabric, you'll want a geotextile material that's at least 4 ounces per square yard to ensure durability while maintaining proper drainage capabilities. Position each roll of fabric carefully, ensuring you're creating a 6-inch overlap between adjacent sheets to prevent persistent weeds from finding pathways through seams.
Secure the fabric edges with landscape pins or staples placed every 12 inches along the perimeter and at each overlap seam, maintaining tension across the entire installation surface. This critical step helps prepare your yard for the next phase of spreading a gravel base layer which provides optimal drainage and prevents weed growth before synthetic turf installation.
Fabric Selection Tips
Good weed barrier fabric is key for artificial grass installation. It affects how water drains and stops weeds from growing. Look at fabric thickness and how well water passes through it.
Pick a non-woven geotextile fabric with at least 4oz weight for homes. Make sure it resists UV rays if any part will be in the sun.
The fabric should let water flow at a rate of 100 gallons per minute per square foot.
Don't use thin fabrics made for flower beds. They won't work well under artificial grass. If you live in a humid place, get fabric with antimicrobial treatment to prevent mold.
When installing, overlap the edges by 4 inches or more. Put landscape pins every 12 inches along all seams and edges. This will keep the fabric from moving over time.
Proper Overlap Techniques
Overlap weed barrier fabric by at least 6 inches at all seams. This creates a solid defense against weeds trying to grow through gaps. Place strips against the direction of any slopes to reduce water getting between layers.
Secure all overlaps with landscape pins every 12 inches along seams. Never align fabric seams with planned artificial grass seams. This prevents weak spots in your installation.
You should use 10-12 inch overlaps in areas with heavy foot traffic. The fabric should extend 3-4 inches up the edges around your installation area. This creates a complete barrier against unwanted plants.
Adding and Compacting the Base Layer
The base layer for your artificial grass requires selecting either decomposed granite or crushed rock (¼" minus), as these materials provide optimal drainage while maintaining stability. You'll need to spread your chosen base material evenly across the prepared area, ensuring a depth of 3-4 inches and maintaining a 1% slope away from structures for proper water runoff.
After distributing the base material, you must compact it thoroughly using a plate compactor in overlapping passes until you've achieved a firm, level surface that won't settle or develop depressions over time. For optimal results, ensure you achieve the recommended thickness level of two to three inches after compaction to create a stable foundation for your artificial turf installation.
Material Selection Process
Base materials are essential for successful artificial grass installation. You should choose each item based on quality and how long it will last. Your lawn will work better and last longer with proper materials.
Class 2 road base offers better drainage and stability than regular gravel. Sharp sand creates a level surface and helps water flow through. Weed membrane stops plants from growing under your turf.
Silica infill sand supports grass blades and adds necessary weight. Quality joining tape and adhesive connect turf sections without visible seams. These connections will hold strong if applied correctly.
Landscape specialists sell better products for artificial grass than general building stores. They offer materials made specifically for fake grass projects. If you use these specialized products, your installation will have fewer problems.
Proper Leveling Techniques
Clear your work area of all plants and debris first. Measure how deep you need to dig, usually 3-4 inches for home projects. Mark the edges clearly to guide your work.
Spread your crushed stone or granite evenly across the area. The surface should slope slightly away from buildings for water drainage. This gentle slope should be about 1-2% to prevent water pooling.
A plate compactor helps pack down the soil properly. Make passes in different directions until the base is 90% compacted. You might need several passes to reach the right firmness.
Check your work with a straightedge and level tool. Fix any low or high spots you find right away. The finished base should feel solid when walked on and provide good support for your turf.
Soil Drainage Preparation
Good drainage is essential for artificial turf installation. You must create a base layer that lets water flow through easily. Testing your soil first helps you understand its drainage needs.
Your base layer should be 3-4 inches of crushed stone or decomposed granite. This material creates water pathways while making the ground stable. It forms the foundation that supports your turf.
Start by applying class II road base or ¾" minus crushed stone across the area. Spread this material evenly to maintain consistent drainage. Then dampen the base with water before you compact it.
Use a plate compactor in overlapping paths for best results. You should compact the material to 90% density for proper stability. Always maintain a 1-2% slope away from buildings to prevent water pooling.
Proper Drainage Solutions
Artificial turf needs good drainage since water can't soak through it like natural grass. Your yard should slope away from your house at a 1-2% grade. This means a drop of about 1/4 inch for every foot of distance.
Check your yard's current grade before installation and look for any low spots. These areas might collect water and cause problems later. You'll need a 3-4 inch layer of crushed stone as your base.
The angular stone creates spaces that allow water to flow through easily. If your yard drains poorly, you might need to add perforated pipes under the base. These pipes should follow the natural slope of your yard.
Water must flow toward proper exit points like storm drains or dry wells. This prevents puddles and protects your turf installation from water damage. Good drainage extends the life of your artificial turf.
Modern artificial grass often includes an advanced geocell drainage that enables 100% vertical drainage to efficiently manage rainfall.
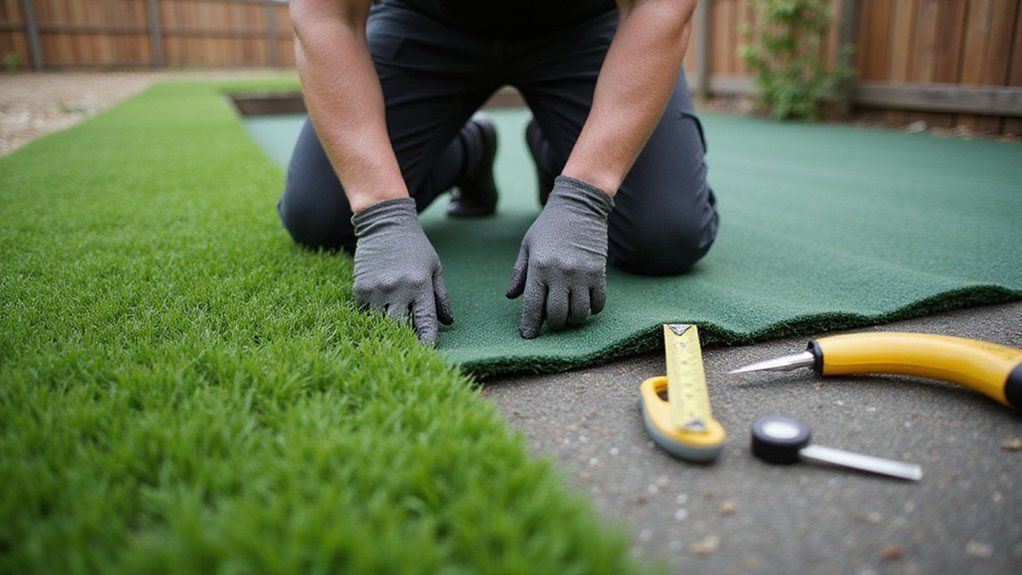
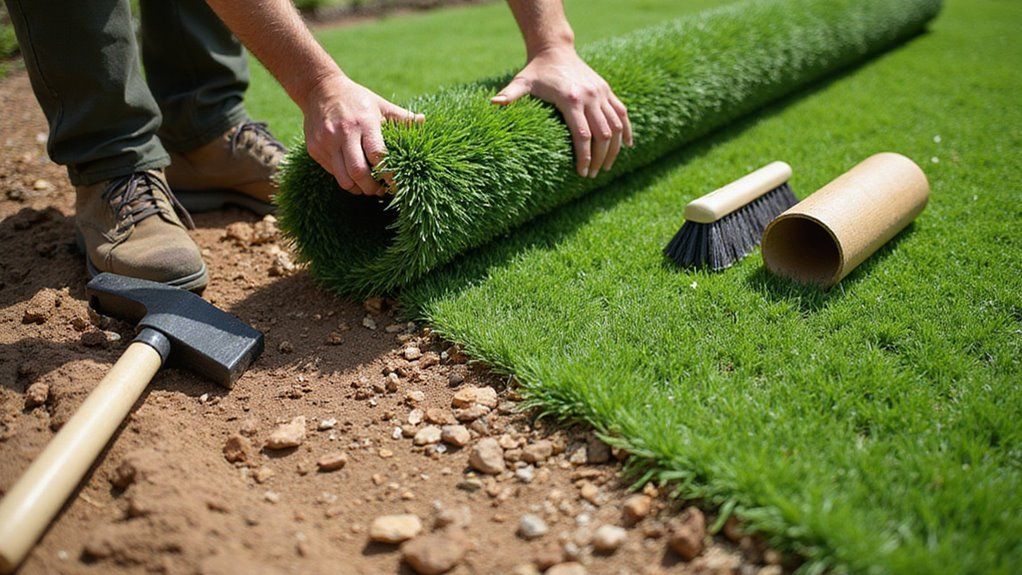
Laying and Cutting the Artificial Turf
Position your artificial turf rolls in the same direction to ensure consistent pile orientation and minimize visible seams.
When making cuts, you'll need to use a sharp utility knife and measure precisely, allowing for a slight overhang that will be trimmed after installation. Cut from the backing side whenever possible to achieve cleaner edges, especially when fitting around curved elements or obstacles in your installation area. Our team with over 20 years of experience in the turf industry recommends this approach for both residential and commercial projects.
Positioning Rolls Properly
Place your artificial grass rolls in the right way for a good-looking result. Each roll should face the same direction to keep the grass looking even. Allow some extra material at all edges for cutting later.
Unroll the turf and let it sit for 1-2 hours before final placement. Point the grass blades toward where you'll view the lawn most often. Keep seams away from areas with lots of foot traffic.
Leave 1/8" space between rolls if you're using adhesive. You can check for evenness by brushing the surface with a stiff broom.
Start from the center and work outward to avoid wrinkles. The material should be gently stretched and smoothed as you secure it. If you take care with positioning, your artificial grass will look natural and professional.
Making Precise Cuts
Precision cuts separate amateur from professional turf installations. You should position your turf correctly before cutting. Always use a sharp utility knife with fresh blades for all cuts.
Measure twice before cutting once. Mark your cutting lines with chalk or a marker for better visibility. Flip the turf over to cut from the backing side when making perimeter cuts.
Paper templates help with obstacles like trees or garden features. These templates ensure accurate angled cuts around complex shapes. Always maintain a 1/4-inch gap along hardscapes to allow for expansion.
For seams, overlap sections by 2-3 inches. Cut through both layers together using a straight edge guide. This creates perfectly matched edges that will disappear after proper securing and brushing.
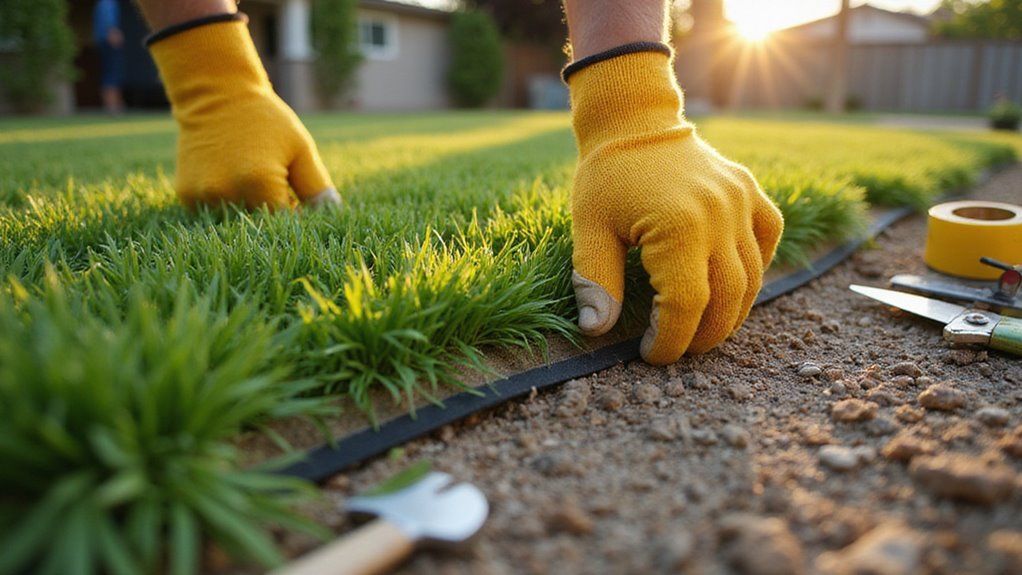
Securing the Edges Properly
Proper edge fastening prevents your artificial turf from lifting and creating hazards. Strong edges block weeds from growing underneath the turf. Good installation needs the right tools and methods.
Use galvanized nails or landscape pins every 3-4 inches around all edges. Install landscape edging or treated wood to define borders clearly. These materials provide a solid frame for your turf installation.
Apply strong adhesive to any seams that meet at the edges. Secure edges against concrete or pavement with outdoor construction adhesive. Tuck extra material under the edge and add more pins for a clean look.
When installing fasteners, hammer them at a 45-degree angle toward the inside. This creates tension across the turf surface. If you skip this step, your turf might develop ripples or lift up later.
For a truly professional finish, check for loose threads and trim them away to ensure the edges maintain a clean appearance throughout the installation.
Adding Infill Material
Your artificial grass needs infill material after edge fastening. Spread silica sand, rubber granules, or cork evenly at 2-3 pounds per square foot. A drop spreader helps create an even layer without clumps.
Use a stiff brush to work the infill into the grass fibers. Brush against the natural grain to help fibers stand upright. High-traffic areas need more compaction to prevent early wear.
Different grass types require different infill depths. Shorter fibers generally need less infill than longer ones. The infill should maintain consistent depth across the entire surface.
A power broom or mechanical brush can help with final compaction. This step creates stability throughout your new lawn. If done correctly, proper drainage will occur through your synthetic grass system.
Brushing and Finishing the Surface
After installing the infill, you must brush the grass to make it look natural. A power broom or stiff-bristled push broom works best for this task. Brush against the grain to lift flat fibers.
Good brushing spreads the infill evenly and stops matting. You should check all edges to ensure they're securely attached. Trim any visible seams if you find them.
Use a leaf blower on low setting to remove any leftover debris. Water the surface lightly so the infill material can settle properly. Brush once more in different directions for an even look.
Check for any low spots where you might need to add more infill. Wait 24-48 hours before putting heavy furniture on your new turf. Regular brushing every 4-6 weeks will make your artificial lawn last longer.
Maintenance Tips for Longevity
Regular cleaning keeps your artificial grass looking new for years. Remove debris with a leaf blower or plastic rake each week. Metal tools can damage the grass fibers, so avoid using them.
Monthly rinsing with mild soap helps eliminate odors and bacteria. Check your turf each season to catch problems early. Fall cleanup of leaves prevents decay under the grass surface.
Snow should be removed with plastic shovels in winter. Summer heat requires occasional hosing to cool the turf and wash away dust. Look for separated seams and fix them quickly with the right adhesive.
High-traffic areas need special attention. Brush these spots against the grain every three months. This prevents matting and helps keep each blade standing upright.
Cost Considerations and ROI
Artificial grass costs between $8-$20 per square foot installed. This upfront investment pays off over time through many savings. Most homeowners break even within 5-7 years.
The savings add up quickly when you stop paying for lawn irrigation. Water bills can drop by 50-70% each year. You'll also save money on fertilizers, pesticides, and weed control products.
Equipment costs disappear since you won't need a lawn mower or trimmer. Your property value may increase by 3-5% with artificial turf. Many installers offer financing options if you need help with initial costs.
Premium artificial turf products usually come with 15-20 year warranties. This means you'll enjoy over a decade of financial benefits after reaching your break-even point. Your savings will depend on local water costs and the size of your lawn.
Conclusion
Your dirt patch has now become a beautiful artificial lawn that will last for many years. With proper base preparation, you've ensured excellent drainage and stability for your turf. The time and effort you invested in compaction and infill will pay off with a lawn that maintains its appearance for a decade or more.
Properly installed artificial grass keeps 95% of its visual appeal even after 10 years of use. This investment provides roughly 20% return compared to maintaining a natural lawn over the same period. You'll save on water, fertilizer, mowing, and other maintenance costs while enjoying a consistently green yard.
If you want professional results without the hassle, consider hiring experts for your installation. They have the tools and experience to handle every step of the process correctly. Install Your Artificial Grass with Synthetic Turf Treasure Coast for a flawless finish that will enhance your property for years to come.
About the author
Kathy Leavell
Kathy Leavell is the founder and owner of Synthetic Turf Treasure Coast, a leading provider of synthetic grass solutions for residential and commercial properties in Florida. With over a decade of experience in the industry, Kathy has become a recognized expert in synthetic turf installation, maintenance, and repair. Under her leadership, Synthetic Turf Treasure Coast has earned a reputation for exceptional customer service and high-quality workmanship.
Prior to starting her own business, Kathy worked in sales and marketing roles at several major synthetic turf manufacturers.