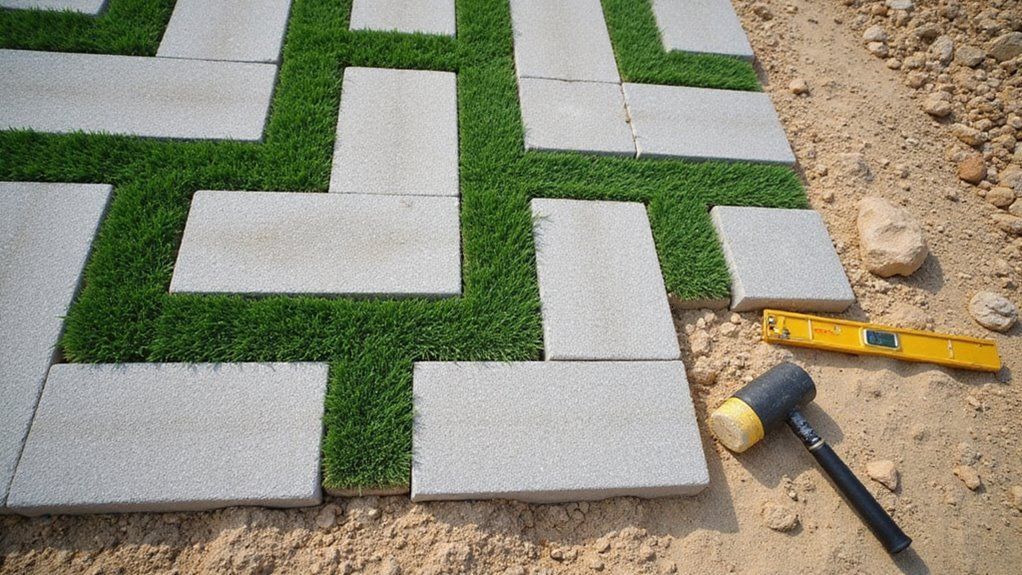
How to Install Pavers With Artificial Grass in Between
Gone are the days of choosing between cold, lifeless pavers and high-maintenance natural grass for your outdoor spaces.
Many homeowners struggle to create visually appealing outdoor spaces that require minimal upkeep. Traditional grass between pavers demands constant mowing, watering, and edge trimming, leading to frustration and wasted weekends. Combining artificial grass with pavers delivers the perfect balance of aesthetics and practicality.
The installation process begins with excavating 4-6 inches deep and laying geotextile fabric beneath crushed stone aggregate. Next, add C-33 sand, establish a 2% slope for drainage, and install edge restraints before placing pavers with consistent joints. Finally, cut UV-stabilized artificial turf to fit between pavers and secure with landscape staples.
This guide explores every step of installing pavers with artificial grass for a stunning outdoor transformation.
Key Takeaways
- Excavate 4-6 inches deep, install geotextile fabric, then add crushed limestone in compacted layers with proper 2% drainage slope.
- Lay pavers in your chosen pattern maintaining consistent ⅛" to ¼" joint gaps for artificial grass strips between stones.
- Space grass strips 2-4 inches for narrow joints or 6-12 inches for wider bands using temporary spacers for uniformity.
- Secure artificial turf with landscape staples every 3-4 inches along edges and seams to prevent movement and lifting.
- Maintain monthly by brushing turf fibers, removing debris, power washing pavers annually, and checking drainage after heavy rain.
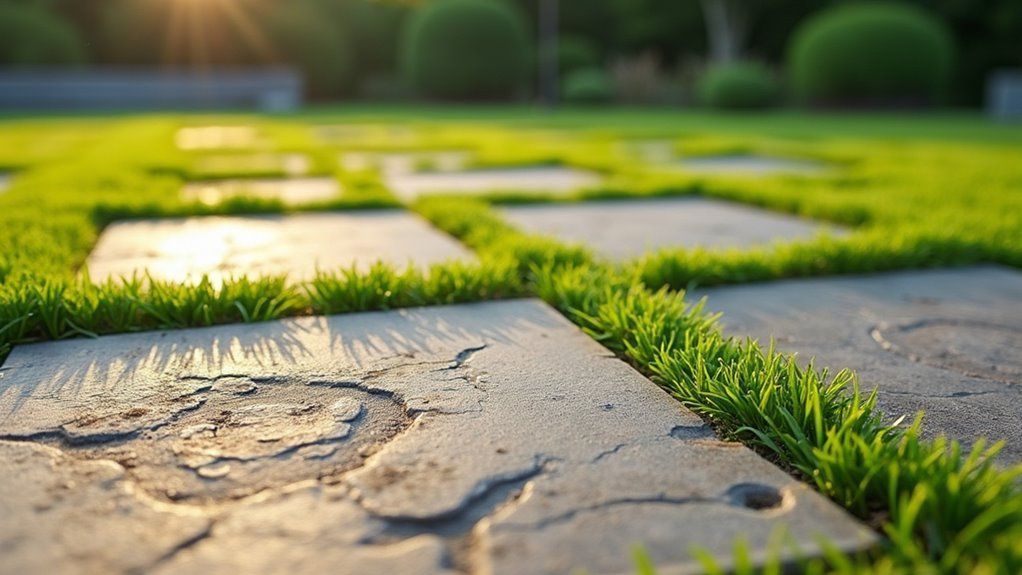
What are pavers with artificial grass?
Pavers with artificial grass combine traditional paving stones with synthetic turf inserts to create unique outdoor surfaces. This modern landscaping solution offers both hard and soft elements in a single design. The system can reduce water usage by up to 50% compared to natural grass installations.
Beyond aesthetics, these hybrid surfaces provide practical benefits for homeowners. The pavers create stable pathways while artificial grass fills the gaps with low-maintenance greenery. As a result, outdoor spaces remain functional and attractive without constant upkeep or irrigation needs.
What are the benefits of using pavers with artificial grass?
You’ll gain multiple advantages when you combine pavers with artificial grass in your installation project. This hybrid system delivers superior drainage performance compared to traditional lawns while eliminating weekly mowing, irrigation, and fertilization tasks.
The design flexibility allows you to create custom patterns that improve curb appeal, reduce water consumption, and meet Florida’s stormwater management requirements.
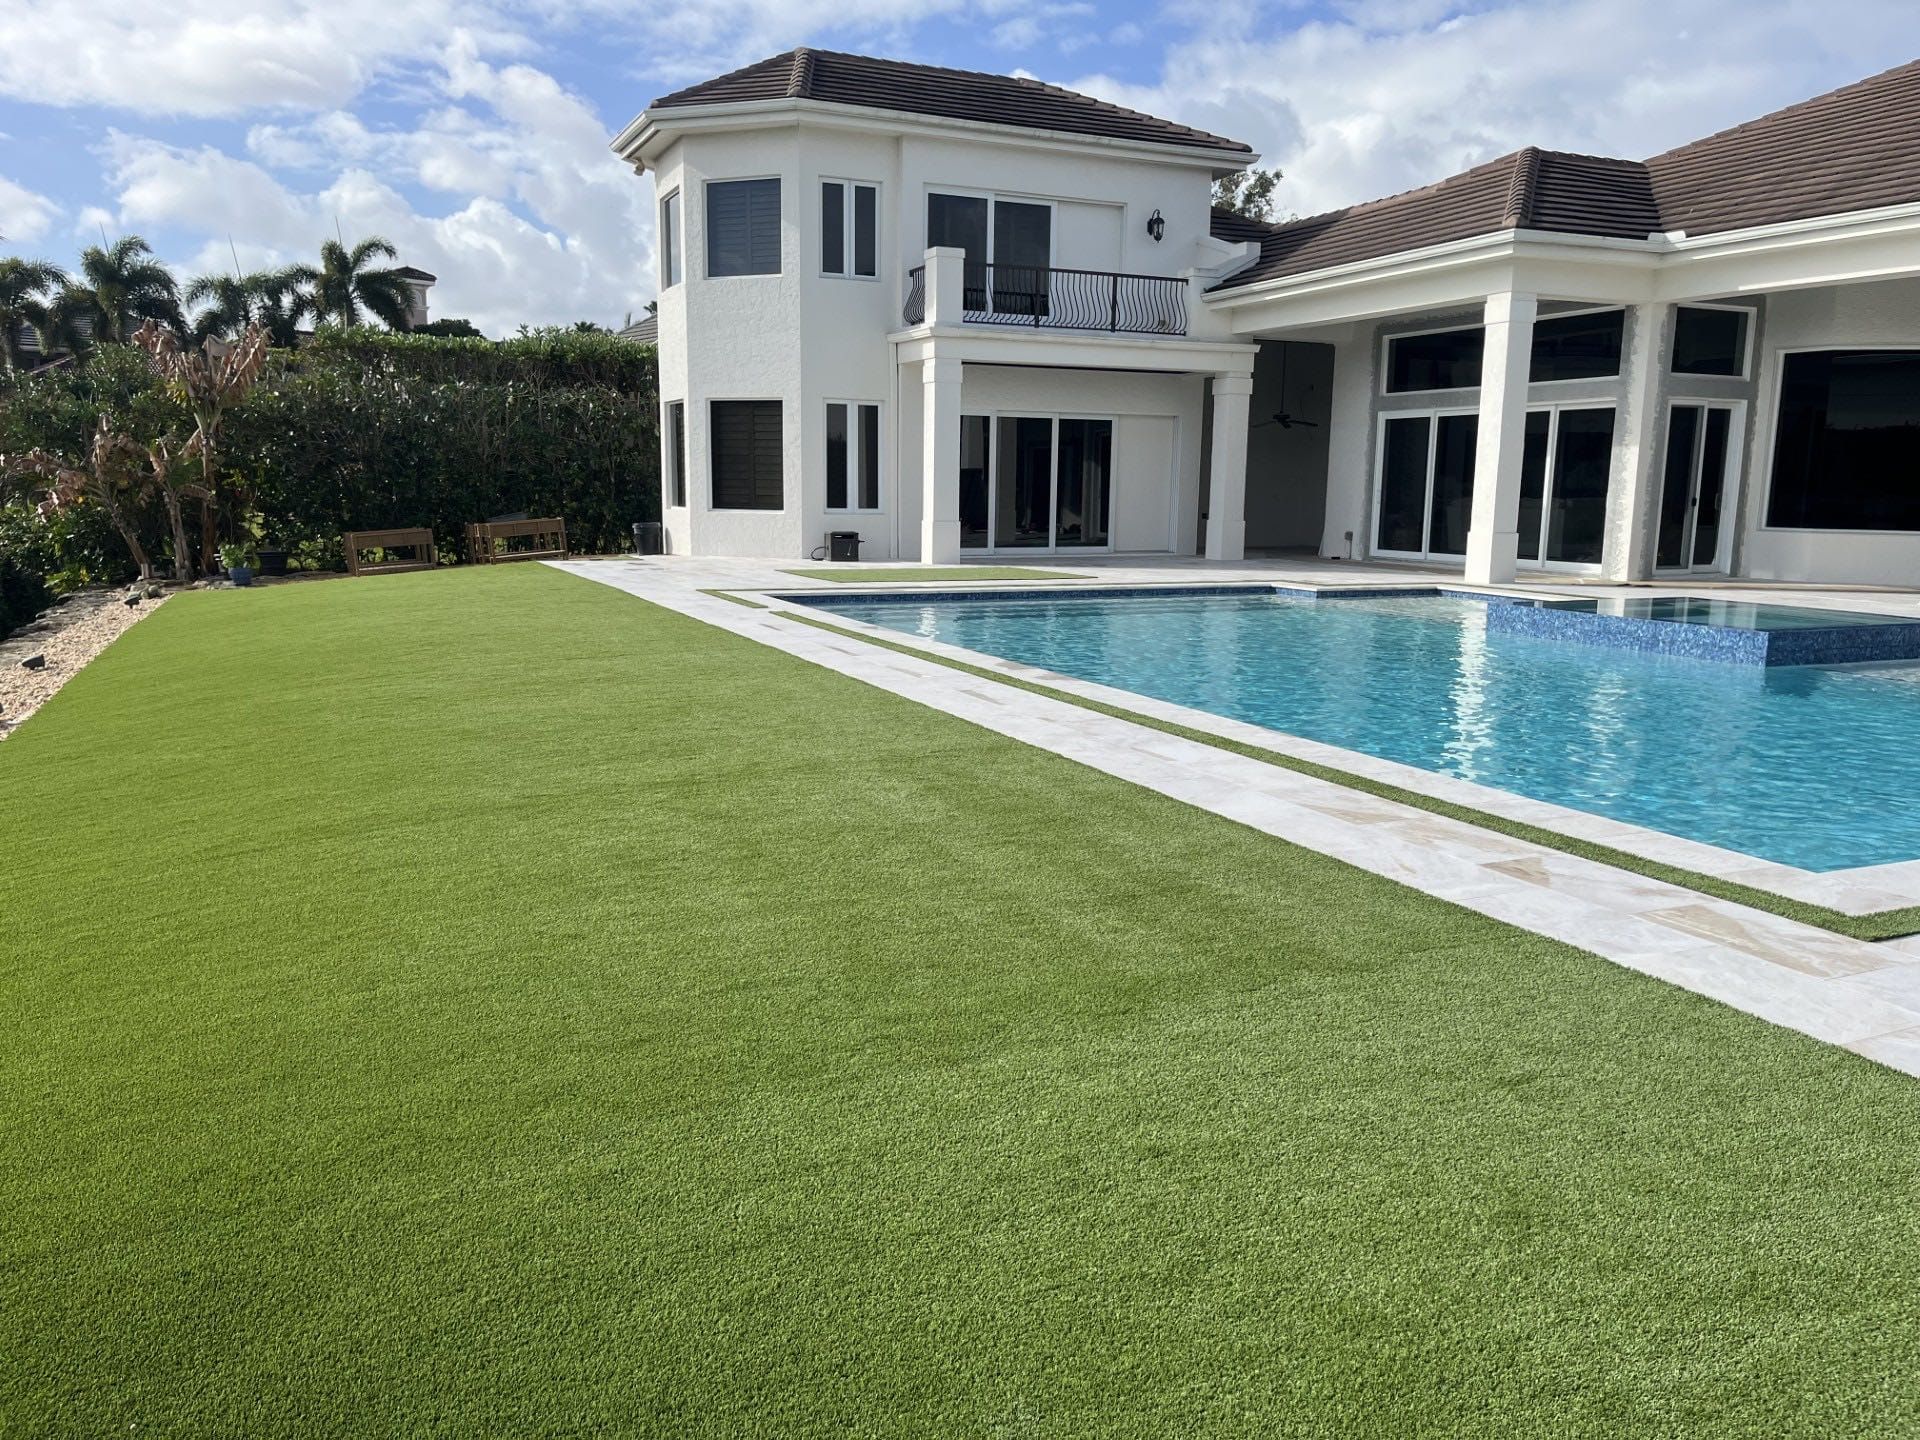
Enhanced aesthetic appeal
Pavers and artificial grass create stunning visual appeal together. The geometric patterns of pavers provide structure, while the green turf adds natural softness. Clean lines and organized layouts catch the eye immediately.
Different paver patterns like herringbone and basketweave offer distinct design options. Natural flow between hard and soft surfaces guides movement through outdoor spaces. Moreover, this combination delivers both beauty and function.
The modern appearance stays fresh year-round without seasonal changes. Additionally, these materials complement any architectural style or home design. Professional installations ensure perfect alignment and seamless transitions between surfaces.
Reduced maintenance requirements
Pavers and artificial grass need very little maintenance compared to natural lawns. A property with these features eliminates mowing, watering, and fertilizing requirements. Artificial turf only needs occasional brushing and debris removal after storms. Pavers simply require periodic sweeping and new sand in the joints.
The simplified maintenance saves significant time and money for property care. UV-resistant artificial grass maintains its appearance without fading in Florida’s sun. This reduced workload allows more focus on other important landscaping tasks.
Improved drainage solutions
Proper drainage prevents water damage and extends hardscape life. A well-planned system moves water away from structures efficiently.
The drainage process requires four key steps: sloping the ground at a 2% grade, placing filter fabric barriers, maintaining 1/4 inch paver gaps, and conducting water flow tests.
Smart drainage design protects foundations from moisture problems. Regular maintenance ensures the system operates at peak performance. Professional installation helps avoid costly repairs down the road.
Most importantly, effective drainage safeguards property value and prevents soil erosion. Reliable systems work silently year-round to channel water safely away.
Environmentally friendly aspects
Pavers combined with artificial grass create an eco-friendly landscape solution. This sustainable combination eliminates water waste and harmful chemicals. Communities using this approach reduce irrigation needs by over 50% according to UF/IFAS Extension studies.
A proper installation sequence ensures environmental protection. The system starts with compacted aggregate, followed by weed barrier and UV-protected turf. As a result, harmful nutrients cannot leach into local water systems.
Moreover, this landscaping method supports Florida’s environmental goals. The design aligns with Florida Statutes Chapter 373 and Florida-Friendly Landscaping Program requirements. The permeable surface manages stormwater while eliminating emissions from gas-powered equipment.
Versatility in design options
Pavers combined with artificial grass offer extensive design flexibility for outdoor spaces.
Four key pattern options exist: grid layouts with uniform spacing, diagonal arrangements set at 45 degrees, random flagstone designs, and herringbone configurations for high traffic areas. These patterns allow homeowners to create unique, functional spaces that match their style preferences.
Florida Building Code requires proper drainage and base preparation for all paver installations. Each pattern choice delivers specific benefits while maintaining safety standards. The modular nature of pavers enables quick adjustments to meet changing needs or preferences over time.
What materials do you need for this project?
You’ll need to gather materials in three categories: surface products (pavers and UV-stabilized artificial turf suitable for Florida’s sunlight), base and drainage components (crushed stone aggregate, leveling sand, and geotextile fabric meeting Florida Building Code requirements), and installation hardware (edge restraints, landscape adhesive, seaming tape, and infill material).
Your tool kit must include both hand tools (level, rake, plate compactor, utility knife) and measuring equipment to ensure proper 2% slope away from structures. Select edging materials—plastic bender board, aluminum trim, or concrete curbing—that will secure both paver boundaries and turf perimeters against Florida’s soil expansion during heavy rainfall events.
Pavers and artificial grass types
Common pavers include concrete, stone, and interlocking types. Artificial grass comes in various synthetic materials rated for sun exposure.
Concrete pavers sized 4×8 inches or larger work best with synthetic turf. These materials allow proper water flow during Florida’s heavy rains. Natural stone pavers help regulate surface temperatures in hot climates.
The right combination ensures stable ground and proper drainage. Local building codes require permeable materials for stormwater management. Rubber or silica infill stabilizes artificial grass during storms. Moreover, UV-resistant turf prevents fading and extends the installation’s lifespan.
Essential tools and equipment
Core tools needed for outdoor installations include: A commercial-grade plate compactor with 3,000-pound force creates stable ground surfaces. Essential supplies include landscape fabric, road base material, and leveling sand. Sharp utility knives and measuring tools ensure precise cuts.
Artificial turf projects require galvanized spikes, outdoor seaming tape, and specialty carpet knives. Strong edge restraints protect against weather damage. Quality materials prevent future repairs and ensure long-lasting results. Professional-grade tools make the installation process smoother and more efficient.
Base materials for proper installation
Essential paver base materials include crushed aggregate, sand, barrier fabric, and edge restraints.
A proper base requires 4-6 inches of compacted limestone or granite aggregate that meets drainage codes. One inch of leveling sand creates an even surface for pavers. Landscape fabric prevents weed growth and maintains base stability.
Strong edge restraints keep pavers locked in position over time. Quality materials ensure proper drainage and prevent future settling issues. These foundational elements protect your investment while managing water flow effectively.
Edging and border options
Three main edging options exist for landscapes: metal, plastic, and stone borders. Metal edging made from aluminum or steel offers the most durability and straight-line precision. Plastic bender board works well for curves but typically lasts only 3-5 years. Natural stone creates an elegant look while providing permanent separation between areas.
For best results, borders should sit flush with the ground surface. All edging needs secure anchoring every 12 inches with galvanized stakes or spikes. Professional installation ensures proper drainage and prevents grass or material spread between sections.
Adhesives and securing materials
The best adhesives for artificial grass installation are polyurethane-based outdoor types. These products create lasting bonds between turf and pavers in all weather conditions.
Successful installation requires four key materials: 6-inch seaming tape, 6-inch galvanized U-pins, non-toxic infill at 2-3 pounds per square foot, and code-approved edge restraints. A continuous bead of adhesive must cover all paver edges.
Furthermore, select adhesives rated for extreme temperatures between 20°F and 180°F. This temperature range ensures durability through seasonal changes and protects your investment.
How to prepare the installation area?
You’ll begin by measuring your site and marking paver and turf zones, then remove all existing vegetation and surfaces down to native soil. Excavate to a depth of 4-6 inches for the aggregate base, accounting for paver thickness and turf profile to achieve finish grade.
Establish a minimum 2% slope away from structures per Florida Building Code requirements, compact the soil base to prevent settling, and verify drainage pathways before proceeding to base installation.
Site measurement and planning
Accurate site measurements prevent costly mistakes and material waste. Take detailed measurements of your installation area before starting any work.
Measure and record the total square footage for pavers and artificial grass sections. Check slope grades to ensure they meet Florida’s minimum 2% requirement. Contact Florida 811 to mark underground utilities before digging.
Create a detailed site plan with your measurements. A proper plan helps calculate material needs and identify potential drainage issues. Your drawing should include paver spacing and grass strip dimensions for precise installation planning.
This careful preparation leads to successful project completion. Professional contractors use these steps to deliver quality results on schedule.
Removing existing grass or surfaces
Remove all grass and existing surfaces completely down to bare soil. A flat-blade shovel works well to strip away grass and roots 2-3 inches deep. The removal depth must reach past root systems to prevent future growth issues.
For concrete surfaces, break up the material with a jackhammer into small, manageable pieces. Clear away all debris thoroughly from the site. Furthermore, proper removal creates the correct depth needed for new base materials.
This thorough preparation prevents weeds and ensures your new surface will last longer. Clean removal also helps manage water drainage effectively in humid conditions.
Excavation depth guidelines
Proper excavation depth protects pavers and artificial turf from water damage and shifting.
Total excavation requires 10-13 inches for optimal drainage and stability. The process starts with measuring paver thickness. Standard concrete pavers need 2.375 inches of depth. A compacted aggregate base demands 4-6 inches for water permeability.
Moreover, bedding sand requires 1 inch for proper paver leveling. Artificial turf installations need 3-4 inches of drainage aggregate plus backing. Building codes mandate a 2% minimum slope away from structures to manage stormwater effectively.
Creating proper drainage slopes
Drainage slopes must angle downward to prevent water damage. A minimum 2% slope (¼ inch per foot) directs water away from buildings, following Florida Building Code standards. A laser level ensures accurate paver placement during installation.
Basic slope requirements protect both pavers and artificial turf. The base needs compacted aggregate material to support proper drainage. Cross-slopes help manage water flow in larger areas.
At key collection points, drainage channels capture water effectively. Regular slope checks during installation confirm correct grading at each layer. This systematic approach maintains community stormwater standards.
Soil compaction techniques
Proper soil compaction creates a solid foundation for outdoor installations. The process starts with digging 6-8 inches below grade level to fit the base materials.
A layer of crushed limestone gets added in 2-inch sections, with each section compacted to 95% density. The surface should feel completely firm with no movement when walking on it.
Before adding the 1-inch sand bed, lay down geotextile fabric to prevent shifting. This method works especially well in Florida’s sandy conditions. Furthermore, these steps ensure pavers and artificial grass remain stable for years.
How to install the base for pavers and grass?
You’ll need to construct a properly engineered base system that meets Florida Building Code drainage requirements and supports both paver and artificial turf sections.
Begin by excavating to appropriate depth, then install a compacted aggregate sub-base with a minimum 2% slope away from structures to ensure water doesn’t accumulate.
Follow this with sand leveling layers, moisture barriers, and secure edge restraints to create a stable foundation that withstands Florida’s heavy rainfall and prevents shifting.
Laying and compacting the sub-base
Sub-base layers require proper installation and compaction to create a stable foundation.
Place geotextile fabric directly on the excavated soil surface. A 6-8 inch excavation depth ensures proper drainage and stability. The ground must slope 2% away from buildings per Florida Building Code.
Next, add crushed limestone in thin layers. Number 57 limestone creates an ideal 4-6 inch sub-base for Florida conditions. A plate compactor ensures proper density. Each 2-inch layer needs 95% compaction for maximum strength.
Finally, check the grade and slope measurements. This verification prevents future settling or drainage issues.
Adding and leveling the sand layer
Start by spreading a one-inch layer of concrete sand across the compacted sub-base. C-33 concrete sand provides the best foundation because its angular particles resist washout from heavy rain. Level the sand surface with screed rails and a straight board. Maintain a 2% slope away from buildings to ensure proper water drainage.
Check the sand’s levelness frequently with a straightedge during installation. Leave the sand uncompacted before placing pavers. The weight of the pavers will naturally settle the sand into a stable base. This natural settling creates an interlocking foundation for long-lasting results.
Creating stable foundation patterns
A stable foundation requires proper compaction and precise leveling before installing pavers or grass.
Create a base layer of 4-6 inches of crushed stone aggregate. Compact the stone in 2-inch layers using a plate compactor. Add a 1-inch layer of bedding sand and level it carefully.
Essential steps include proper drainage and edge restraints. Install edge restraints along the perimeter to prevent spreading. Maintain a 2% slope away from buildings for water drainage.
Perfect leveling prevents future settling issues. Check elevations multiple times during installation. Furthermore, proper preparation extends the life of your hardscape investment.
Moisture barrier installation
Lay geotextile fabric directly over the compacted aggregate base to create a moisture barrier. Roll the fabric across the installation area with 6-inch overlapping seams. Place landscape staples every 2 feet along edges and seams to secure the material. This barrier prevents soil from mixing with the aggregate while maintaining proper drainage.
The nonwoven material blocks weed growth without causing water buildup underneath. A properly installed moisture barrier protects your artificial grass investment. Professional installation ensures lasting performance in high-rainfall areas.
Edge restraint placement
Edge restraints should be installed around the perimeter of artificial grass patios to prevent shifting and maintain borders. Placement requires setting restraints at a depth equal to turf thickness plus infill material (typically 2-3 inches total). Stakes must be driven below the local frost line, though Florida installations need minimal depth. Connect restraint sections with 4-inch overlaps to ensure continuous containment.
Professional installers use string lines to verify proper alignment before final anchoring. This method creates stable, long-lasting boundaries that keep artificial turf secure and looking neat.
How to lay pavers in your desired pattern?
Once you’ve prepared and compacted your base, you’ll select a paver pattern—such as herringbone, running bond, or basketweave—that suits your design goals and accommodates grass strip spacing.
Use a mason’s string and stakes to establish straight reference lines, then begin laying pavers from a fixed corner or edge, maintaining consistent joint gaps (typically ⅛" to ¼") where artificial grass will insert. Cut pavers with a masonry saw or chipper to fit irregular borders and curves, checking level and alignment continuously with a straightedge and torpedo level before securing each section.
Common paver pattern options
Four main paver patterns exist: herringbone, running bond, basketweave, and random layouts.
Herringbone patterns create the strongest interlock, perfect for driveways and areas with heavy traffic or ground movement. Running bond patterns place pavers in offset rows for moderate stability and simple installation. Basketweave designs pair rectangular pavers to form a woven look, best suited for patios and walkways. In addition, random patterns mix different paver sizes for a natural appearance but require careful planning.
These pattern choices affect both visual appeal and structural integrity. Your selection should match the intended use and location of the paved area.
Spacing techniques for grass strips
Grass strips between pavers require precise spacing for an appealing look and proper function. Standard grass strip widths range from 2 to 4 inches for narrow joints or 6 to 12 inches for wider bands. Mark your planned strips with chalk or string lines at even intervals.
Place temporary spacers to maintain consistent gaps during installation. Always slope the surface away from buildings according to Florida Building Code standards. Beyond that, secure the edges with restraints first.
As a final step, compact the base material within the marked strips before adding artificial grass. This method ensures proper alignment and lasting results.
Cutting pavers to fit unique spaces
A power saw with a diamond blade offers the most precise cuts for pavers in unique spaces. Score each paver along your marked line with a straightedge guide. The blade depth should reach halfway through the paver’s thickness.
Straight cuts require a masonry saw, while curved cuts need an angle grinder with a diamond blade. Maintain proper spacing between pavers at 1/8 to 1/4 inch. A well-cut paver should fit snugly without forcing or damaging adjacent pieces.
To ensure lasting results, preserve the recommended slope of 1 inch per 8 feet for proper drainage.
Leveling and alignment methods
Proper leveling and alignment ensure a professional paver installation that lasts for decades. Reference strings create straight lines for precise layout and maintain a 2% drainage slope away from buildings. Rubber mallets help settle pavers evenly into the base material.
Base material adjustments fix individual paver heights to create a smooth surface. Each paver must maintain consistent 1/8-inch to 1/4-inch joint spacing with neighboring units. Regular level checks prevent dips and high spots during installation. Simple height adjustments with sand or gravel keep the surface even.
Securing pavers in place
Pavers need proper anchoring to stay securely in place over time. First, press each paver firmly into the base material with a rubber mallet while checking for level placement. Next, install edge restraints made of concrete, aluminum, or plastic according to local building codes. A plate compactor will stabilize the entire paver surface effectively.
To lock pavers together permanently, sweep polymeric sand into all joints before adding any turf or surface materials. These steps create a solid foundation that prevents shifting and maintains structural integrity. The complete process takes about 2-3 hours for an average patio area.
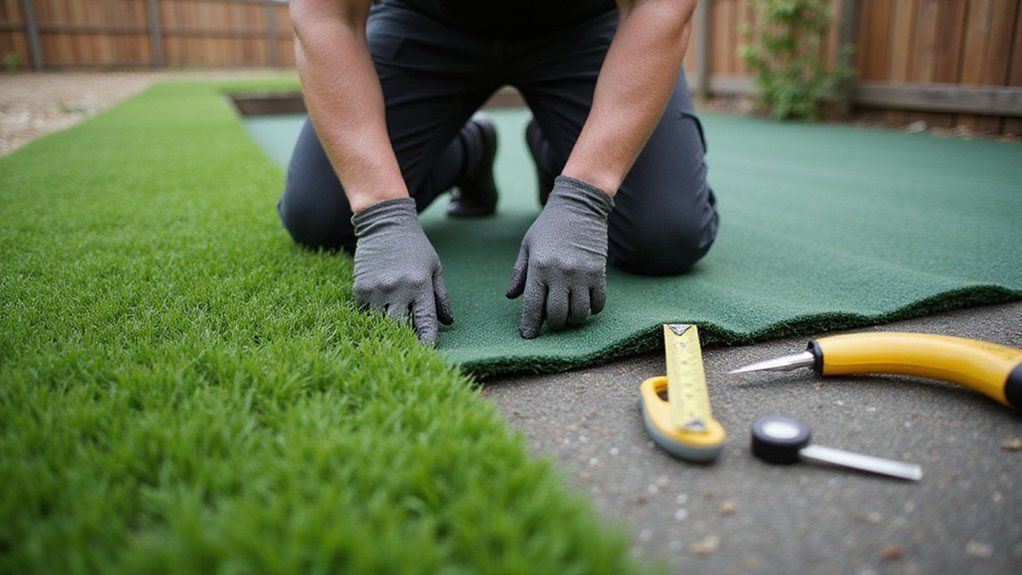
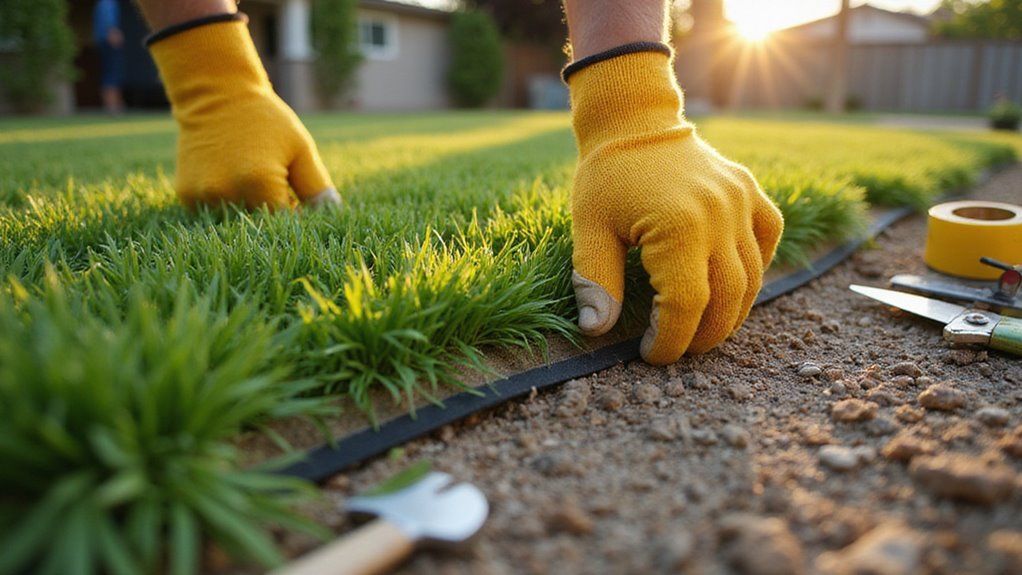
How to install artificial grass between pavers?
You’ll begin by measuring each grass section precisely and cutting turf face-down to prevent fraying, leaving 2-3 inches for trimming adjustments.
Secure the artificial grass to your compacted base using 5-6 inch galvanized landscape staples or nails spaced every 3-4 inches along edges and seams. Apply silica sand or crumb rubber infill with a drop spreader, then power-brush the turf fibers upright to achieve proper blade orientation and infill distribution.
Measuring and cutting artificial grass
Measure twice and cut once to install artificial grass correctly. A tape measure and sharp utility knife are essential tools for this task.
Start by measuring each area where the artificial grass will go, adding one inch of extra material on all sides. Mark your measurements with chalk on the grass backing, not the front. Turn the grass upside down on plywood for cutting.
Cut the artificial grass backing three times with a utility knife against a straight edge. This technique creates clean edges and prevents fraying. The plywood underneath protects your work surface from damage.
Securing grass to the base
Landscape staples and adhesive secure artificial grass between pavers effectively. Place 6-inch landscape staples every 3-4 inches along all edges where the grass meets pavers. Apply seaming tape with strong adhesive at joining points between grass sections.
For extra stability in high-traffic areas, double the number of staples. The correct installation creates seamless transitions and prevents lifting or movement. Once properly secured, your artificial grass will stay firmly in place for years.
Infill application techniques
Artificial grass infill must be applied in systematic layers for optimal performance and longevity.
Begin with a thin layer of infill spread evenly across the surface. Each section needs 2-3 passes for proper coverage. Brush the infill deeply into the artificial grass fibers after every application. This technique ensures complete blade support.
A simple walking test confirms proper blade recovery and stability. High-traffic areas require 15-20% more infill material between pavers. Regular maintenance checks help prevent matting and preserve the grass structure in humid environments.
Brushing and finishing touches
A stiff-bristled broom removes debris and lifts artificial grass blades upright after installation. Work against the turf grain in multiple directions with a power broom or push broom. Cross-brushing helps distribute infill evenly between pavers.
Regular maintenance keeps the turf looking fresh and draining properly. Monthly brushing sessions maintain optimal appearance, especially after heavy Florida rains. Check seams and paver edges during each cleaning. Remove any loose debris from the surface.
Seam joining methods
Seam joining requires proper technique to create durable connections in artificial turf installations.
Clean the turf backing with a solvent to remove all dirt, dust, and moisture before application. The surface must be completely dry for optimal adhesive bonding. Apply commercial-grade seaming adhesive evenly across the joining area.
Wait until the adhesive reaches a tacky consistency, typically 5-10 minutes depending on temperature. Adjacent turf sections must have seams staggered at least 3 feet apart. Strong backing material ensures secure seam connections that withstand heavy use.
Furthermore, press seams firmly together and allow full curing time according to manufacturer specifications.
What maintenance is required for this installation?
Regular maintenance tasks include monthly brushing, debris removal, and annual power washing to keep the installation in top condition.
Brush the turf fibers once per month to maintain proper blade direction. Remove leaves, twigs, and other debris from both pavers and grass surfaces regularly. After heavy rain, check drainage and infill levels for any needed adjustments.
Seasonal tasks ensure long-term durability. Power wash the pavers once a year to prevent algae buildup. Additionally, inspect edge restraints and weed barriers twice yearly. These steps will protect your investment and maintain its appearance.
Ready for a perfect lawn? Contact Synthetic Turf Treasure Coast today!

Synthetic Turf Treasure Coast transforms yards with expert artificial lawn installation. Our certified team understands Florida’s unique climate needs. We deliver precision results built for coastal conditions.
Each project starts with a thorough site check to meet Florida Building Code drainage rules. UV-resistant turf options protect against intense sunlight exposure. Professional base preparation ensures proper water flow. Clear maintenance instructions help manage debris after storms.
Your lawn will help conserve water and protect local watersheds. Artificial turf eliminates harmful fertilizer runoff into sensitive water systems. Contact us to create your perfect, eco-friendly outdoor space.
About the author
Kathy Leavell
Kathy Leavell is the founder and owner of Synthetic Turf Treasure Coast, a leading provider of synthetic grass solutions for residential and commercial properties in Florida. With over a decade of experience in the industry, Kathy has become a recognized expert in synthetic turf installation, maintenance, and repair. Under her leadership, Synthetic Turf Treasure Coast has earned a reputation for exceptional customer service and high-quality workmanship.
Prior to starting her own business, Kathy worked in sales and marketing roles at several major synthetic turf manufacturers.